
Send automated emails with Workflows
In this article:
Workflows allow you to send scheduled emails to a subset of your audience based on a trigger. Workflows have various use cases, including:
- Teaching an online course where learning materials are delivered every week, for three months
- Sending a personal thank-you note after each purchase
- Asking for feedback when a customer cancels their membership
- Sending monthly marketing tips to your affiliates
Create a workflow
Creating a workflow is quite similar to creating a product on Gumroad.
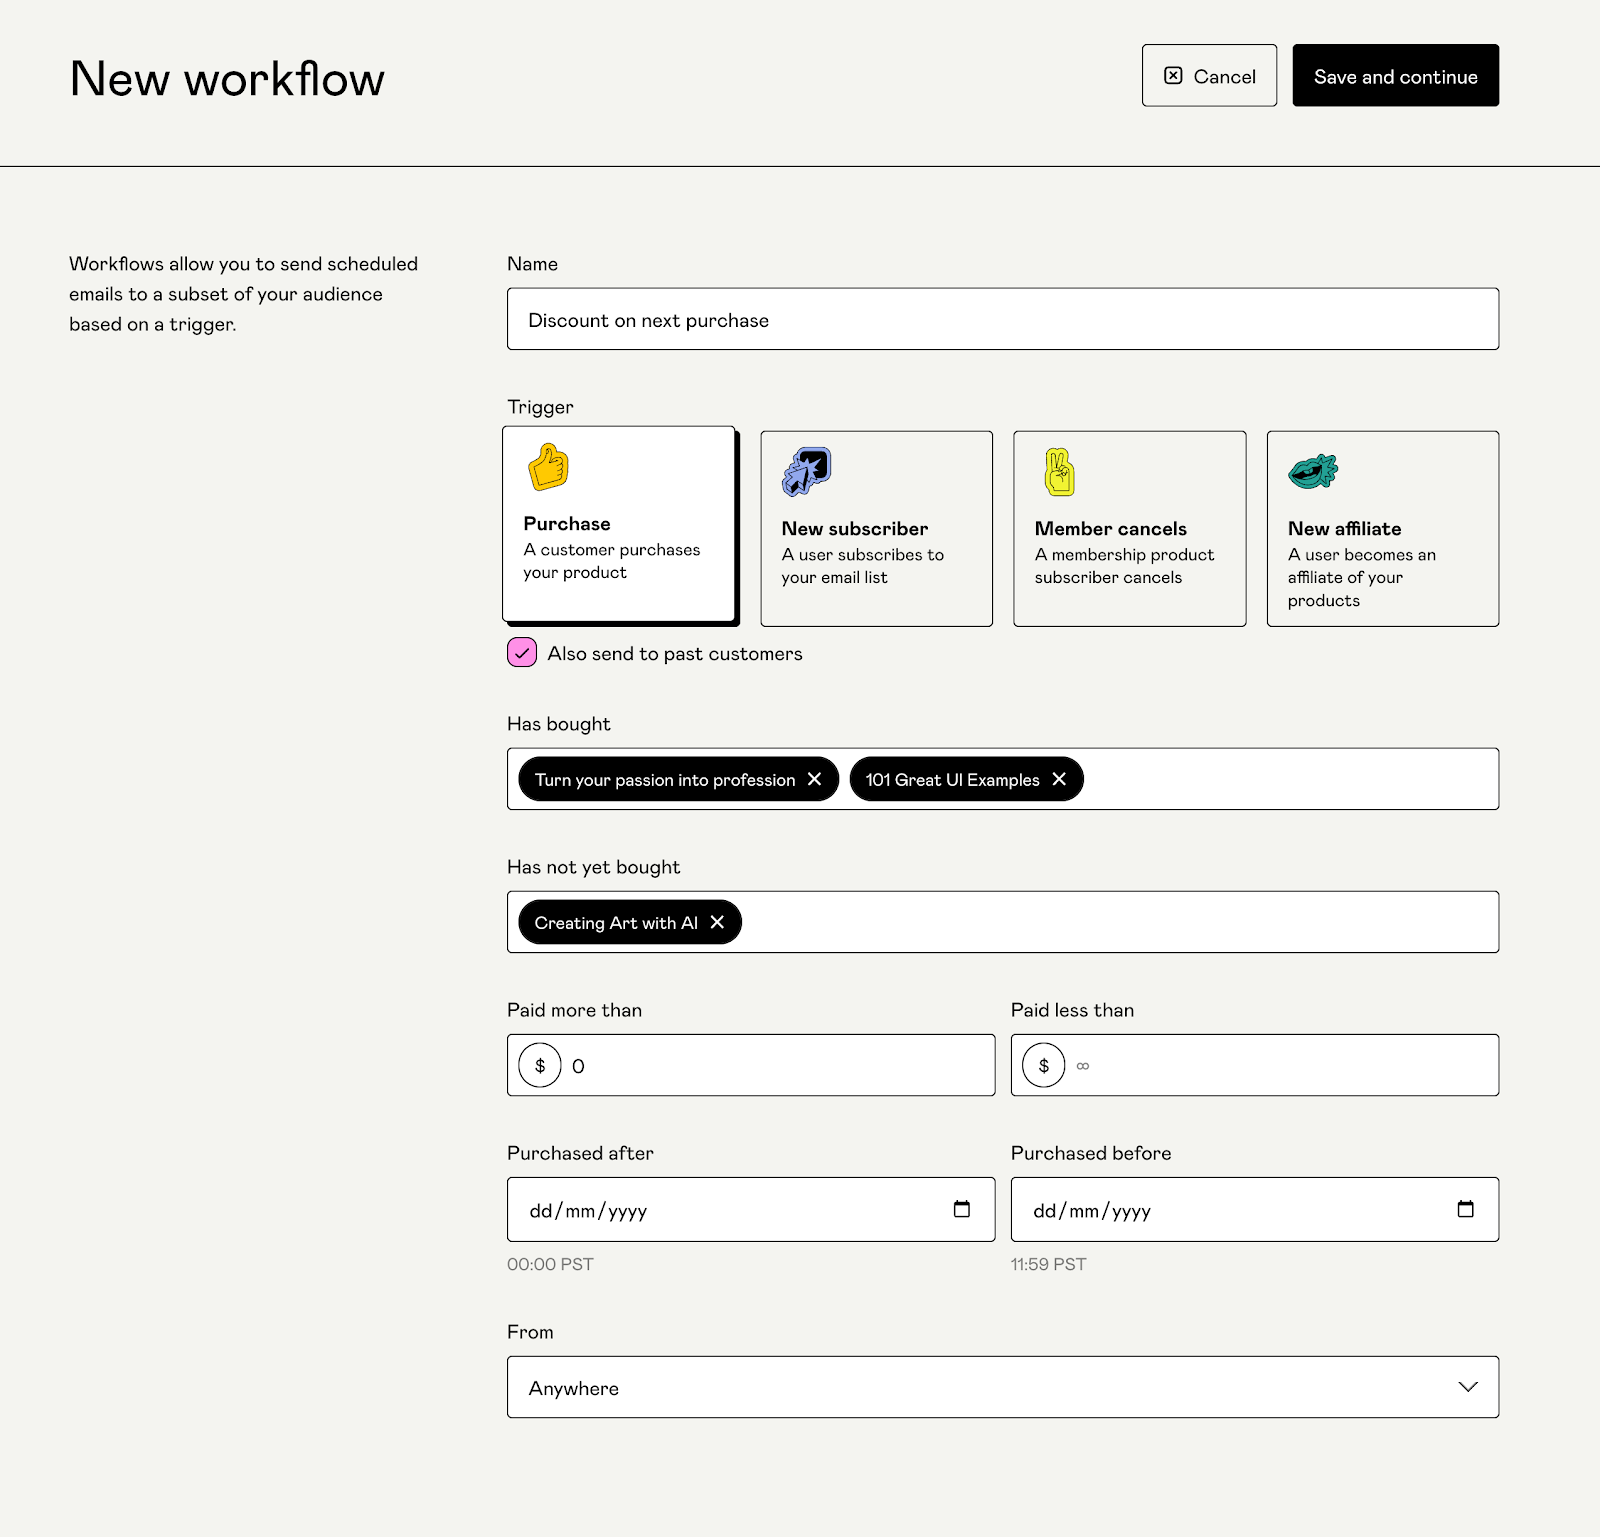
- Go to your Workflows dashboard and click ‘New workflow’ on the top right.
- Name your workflow and choose a trigger that will activate your workflow:
- e.g., A new purchase, a new subscriber, a membership cancellation, or a new affiliate.
- Customize the audience list for each trigger by applying filters.
- You can send the workflow only to customers of specific products by mentioning the product in the ‘Has bought’ filter, or customers who have not bought a product with the ‘Has not yet bought’ filter.
- You can filter further by the date purchased/joined/cancelled or the amount paid, wherever applicable.
- Each trigger also allows you to send emails to previously eligible audience members.
- Once you’re ready, click ‘Save and continue’ to add emails to your workflow.
Note:
- Except for the workflow’s name, you cannot update any of these settings once a workflow has been published for the first time.
- You can only add one product in the ‘Has not yet bought’ filter.
- ‘Member cancels’ workflows will be triggered at the end of the customer’s membership–i.e. when the already billed period ends, not when the membership cancellation is requested.
- If you have a multi-email workflow set up, a customer will stop receiving emails from this workflow once they purchase a product included in the ‘Has not yet bought’ filter.
Add emails to your workflows
Click ‘Create email’ to draft your first workflow email. You can schedule it to go out after a certain number of hours, days, weeks, or months after the trigger.
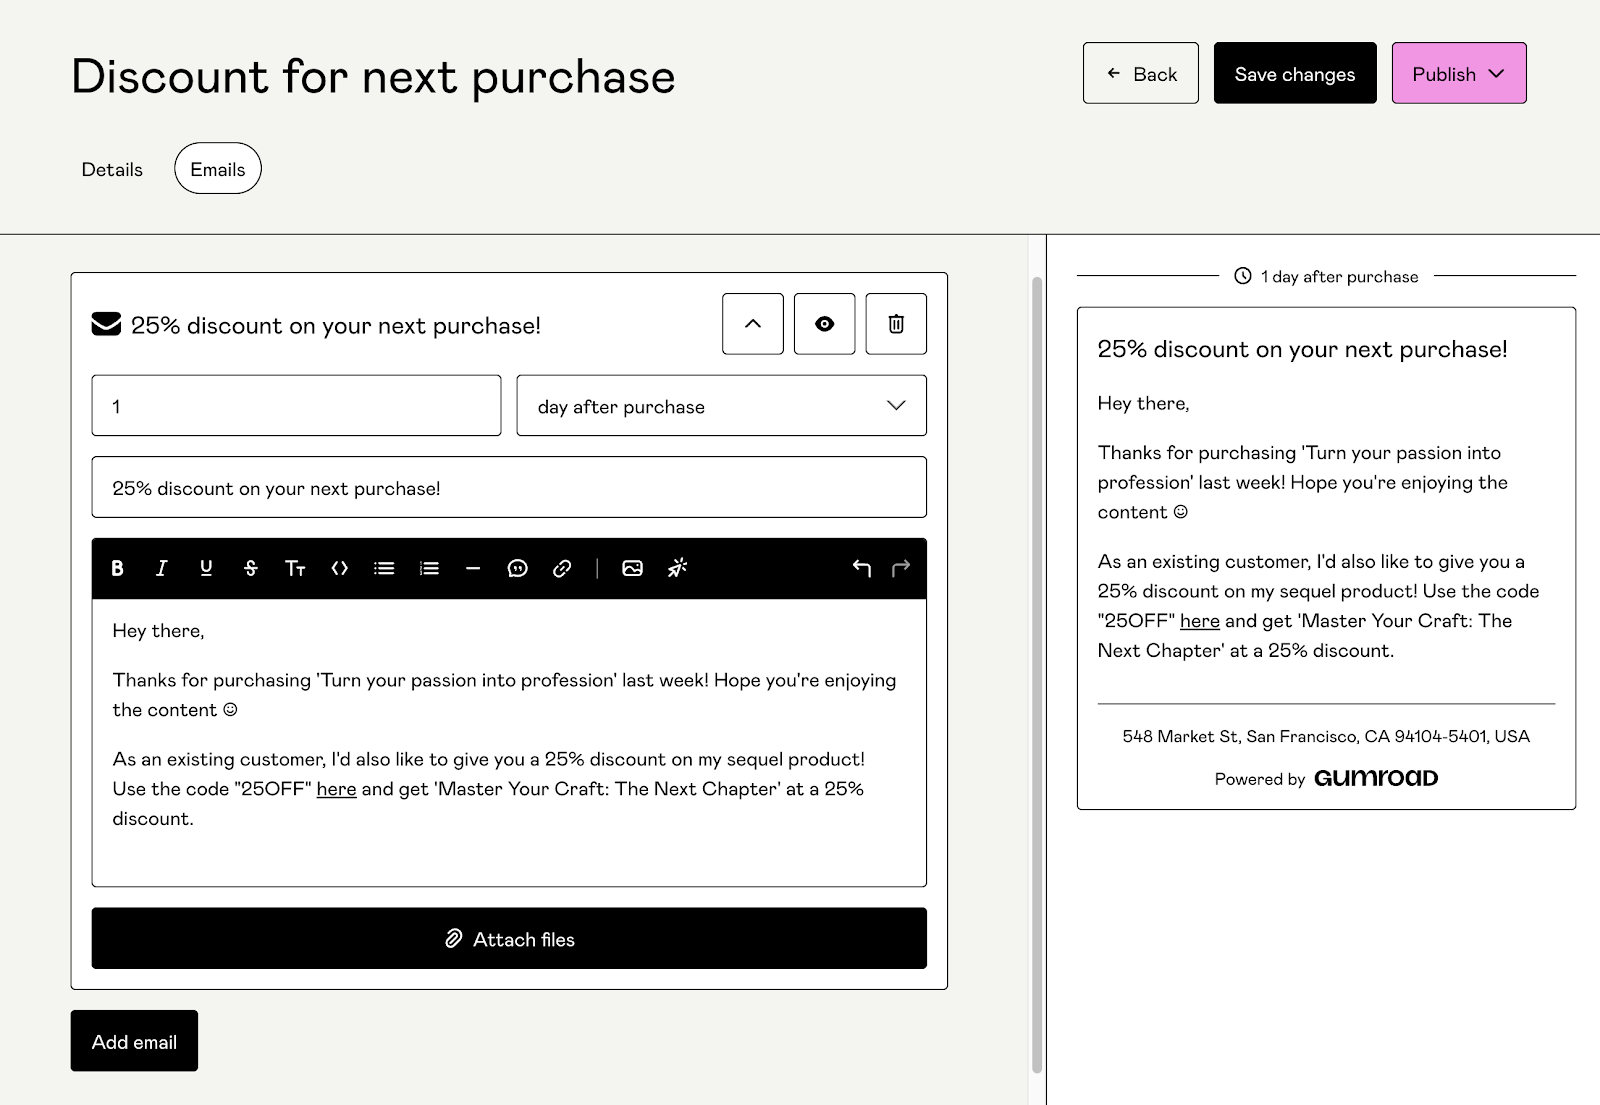
To add more emails to the workflow, just click ‘Add email’ and repeat!
Send yourself an email preview to see how your target audience will, and once you’re ready, click Publish to activate the workflow.
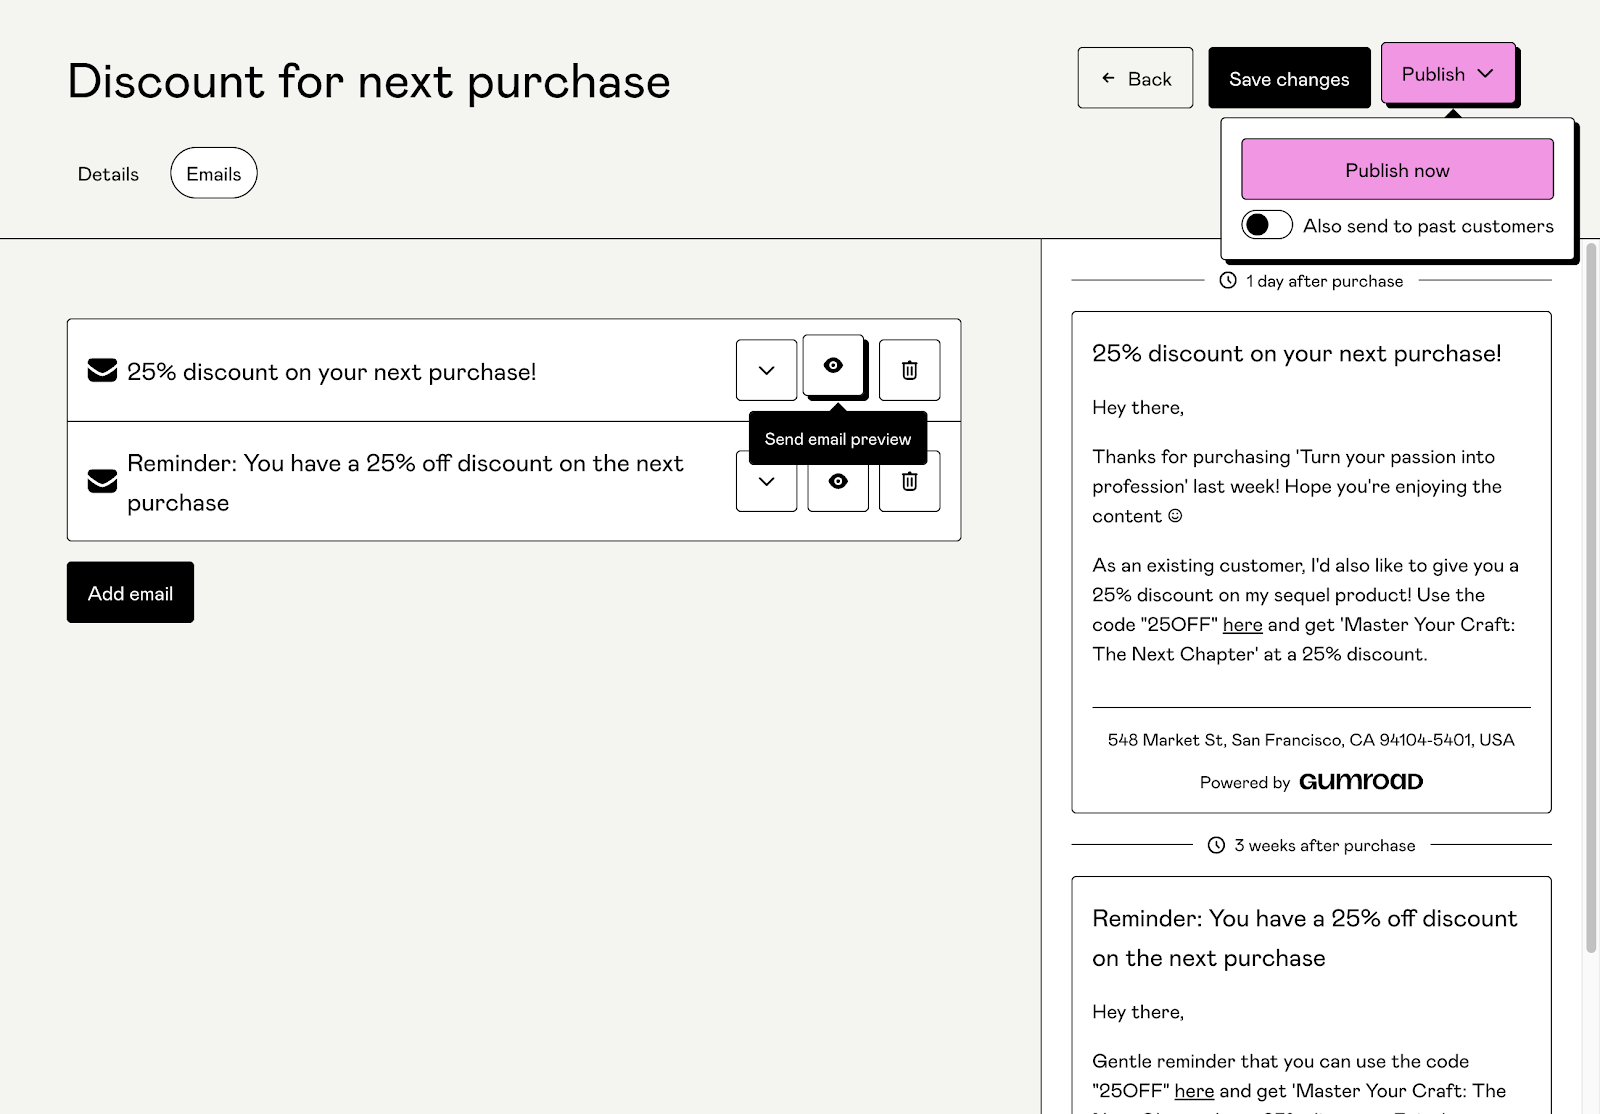
You can also just save your changes and come back to them later, or edit your emails even after publishing!
Your audience's experience
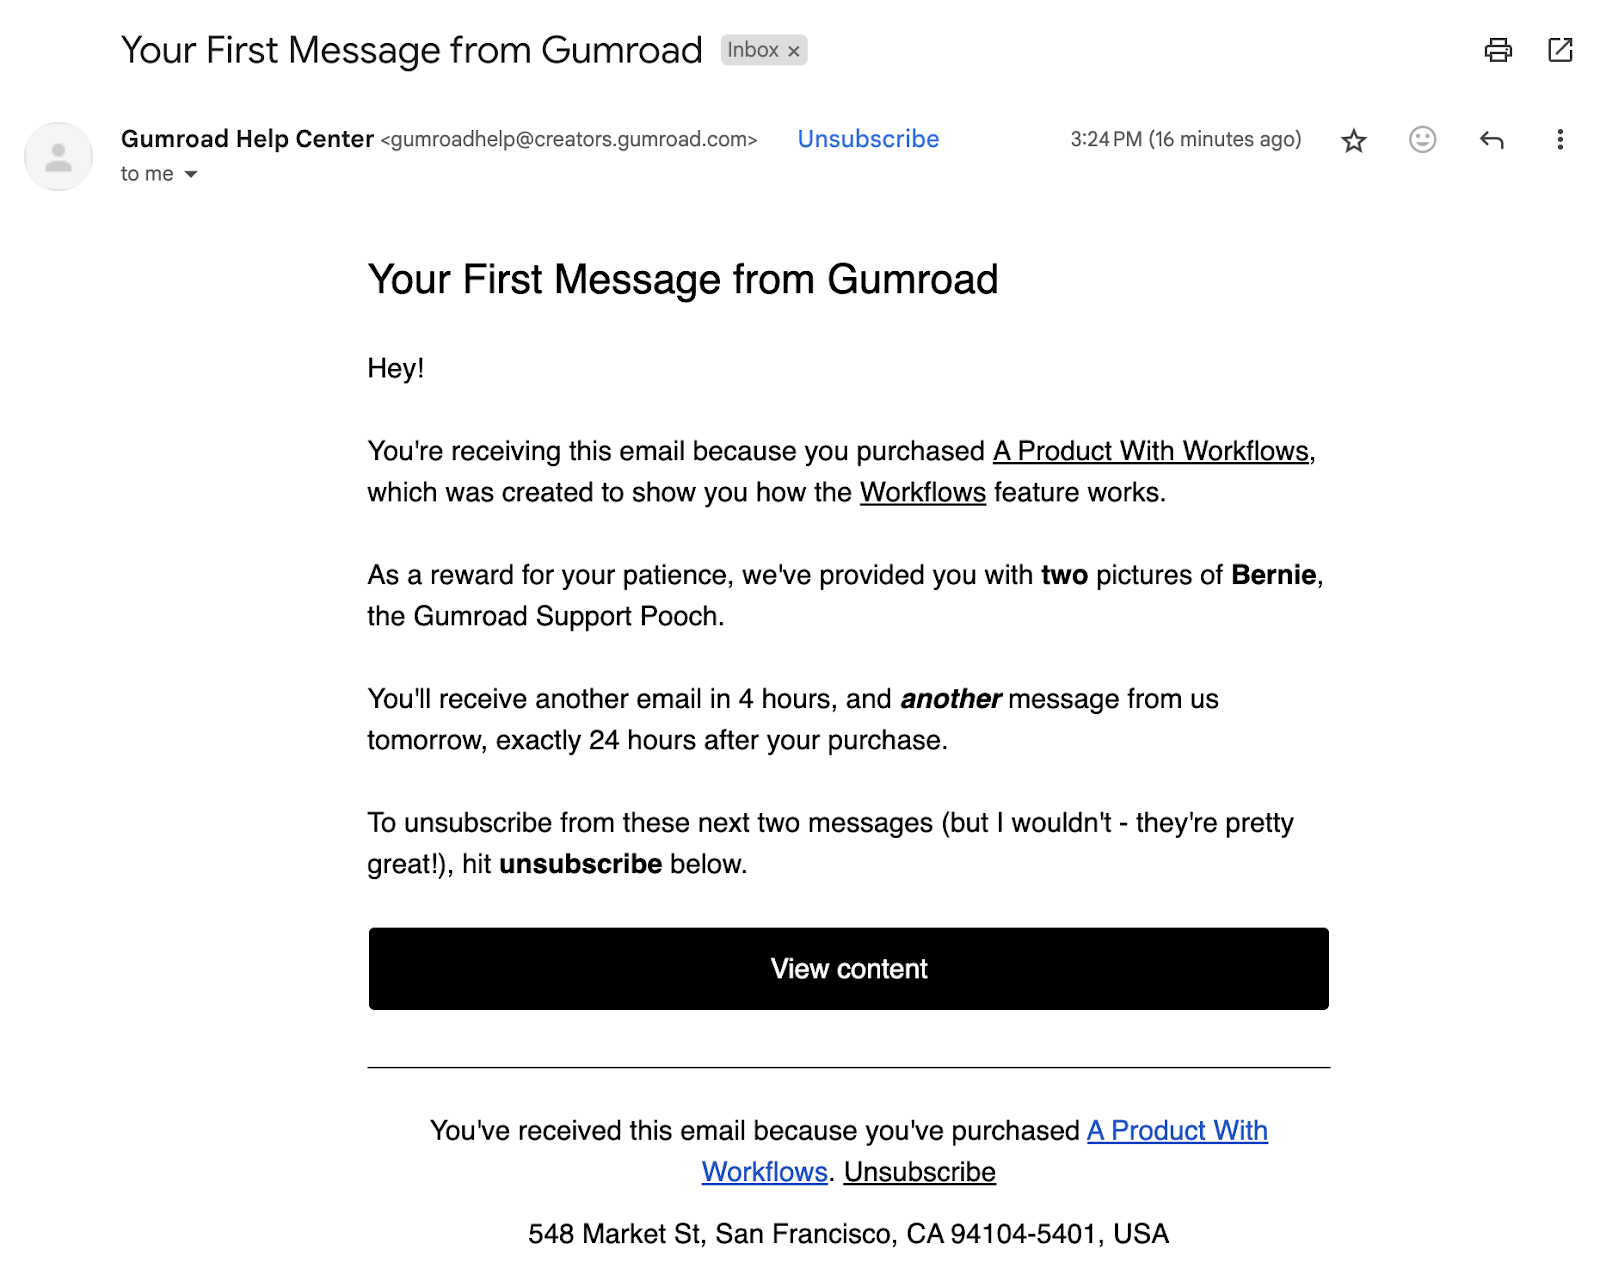
Your audience will receive workflows as emails with links to any files you've attached.
The emails will be addressed from you (specifically, the name you have entered in your profile settings), but with a @gumroad.com email. Unfortunately, it is not possible to use a custom email here as of now, but any replies to these emails will be sent to your support email.
Test out the experience for yourself by getting this free example product!
Please follow this article if your customers report about not receiving workflow emails, or if you’d like to resend them.